E36103B
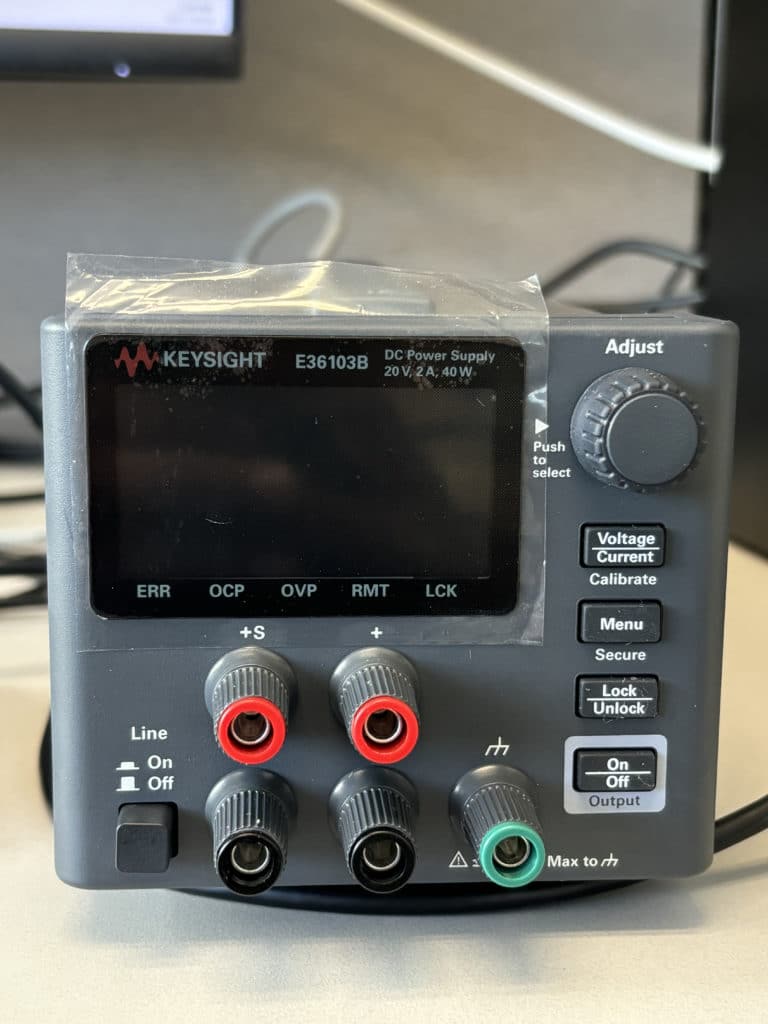
The front panel of E36103B
General Hardware Guideline

- Changing Voltage: You can change each digit of the voltage value by rotating the Adjust knob. Each time you press the Adjust knob, you’ll see the blinking underline will shift its position to the right. Thus, you’ll be able to change each digit separately. The highest value that was gotten was 20.6 V
- Changing Current: Now, to change the current value, press the Voltage/Current button on the front panel. You will see that the blinking underline shifted its position to the current value. Like previously, you can change the current value. If you again press the Voltage/Current button, the underline will shift to voltage value.
- Enabling the Output: Press the On/Off button, to enable the output from the power supply. There can be a little mismatch between the actual output voltage and the voltage that you programmed earlier. If the output is not enabled, you’ll see a big OFF written on the display. Here, ‘+’ and ‘-‘ are the output terminals.
- Configure the LAN/USB interface: Here, I shall describe configuring the USB interface. By a similar procedure, you shall be able to configure the LAN interface. To configure the USB interface:
- Press the Menu button.
- Turn the Adjust knob until you get the option I/O Config. Press the knob
- You’ll see the option LAN. Turn the knob to get the option USB.
- You’ll see the USB info of the interface. The USB address is: USB0::10893::5634::MY61002609::0::INSTR. You can use this address to establish communication between any programming interface in your PC and the device.
- Similarly you’ll get the LAN info from the Menu.
- Locking the Device: You can lock the device by pressing the Lock/Unlock button. While locked, you’ll see there is a inverted triangle on the displace just above the LCK writing. While locked, you cannot change any setting in the device. To unlock the device, long press the button Lock/Unlock until the Hold Key is not gone from the display.
Working with the Software ‘BenchVue Basic App’
- Installing the Software: Visit the website: www.keysight.com/find/BVBasic. Scroll to BenchVue Basic Online Installer. Select the Power Supply: Standalone app option. Hit the Download option. Explore the software and you’ll be able to download the software quite easily.
- Connecting the Instrument with the PC: To control the instrument with your PC, they need to be connected. Connect them with a USB-A to USB-B cable. After that turn the power supply ON. Only after that, the instrument will be discoverable by the PC.
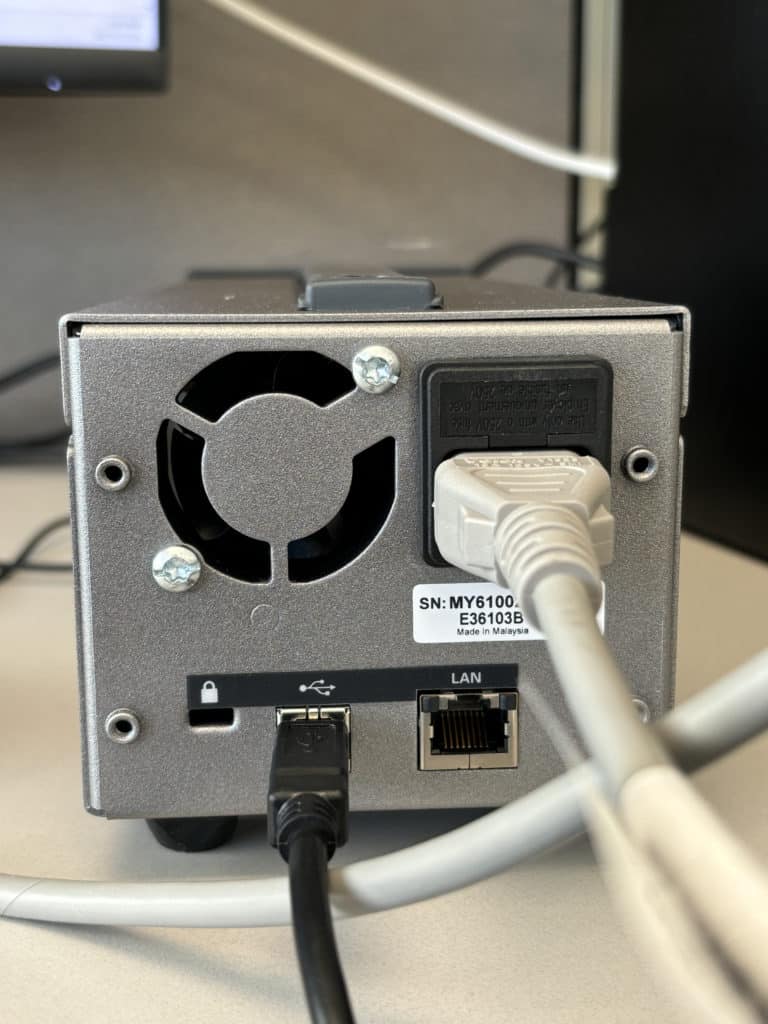
The back panel of E36103B
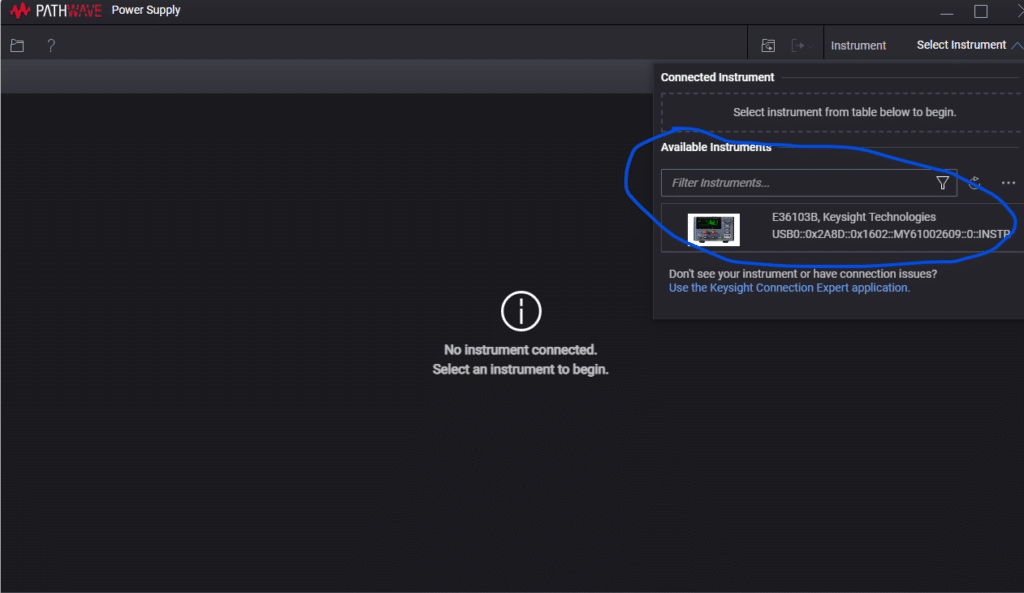
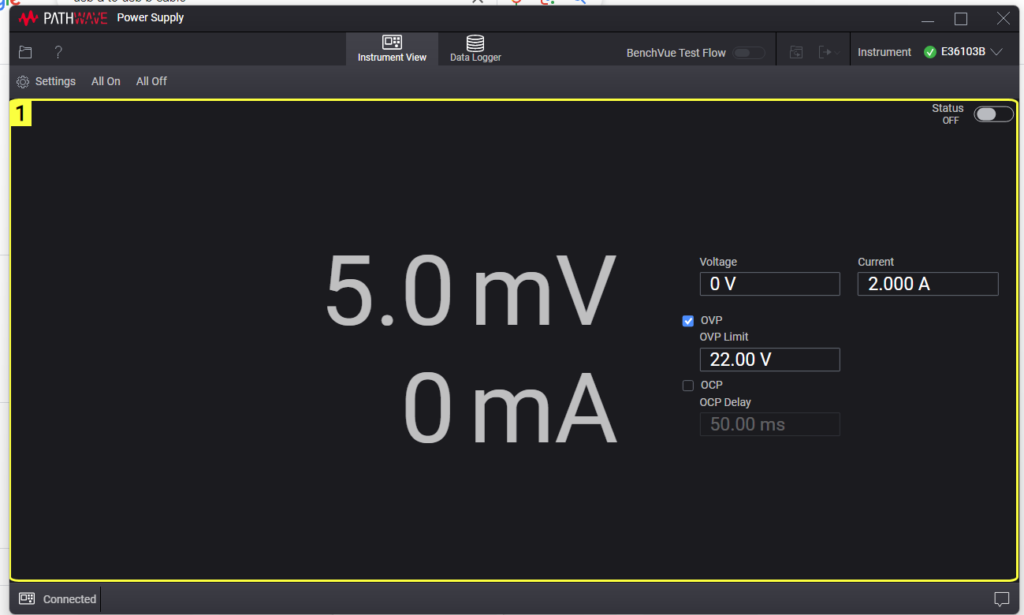
- On the software, in the upper right-corner you will see a Select Instrument option. Press that, and on the Available Instruments tab, you should see the device that is connected to the PC. On that option, to the right, there is a Connect Instrument option (It’s a bit hard to find out). Click on that option. Now, you’ll be able to control every parameter of the device with the software.
Working with MATLAB classes
For modular operations, you can create your own class for controlling the power supply, using the SCPI Programming. Dr. Dima had already written a class ClassAgilentSupply. Through that class, you can control four separate power supplies. Each of them is configured for special operations. However, for standalone operation and specially to control the supplies E36103B and E36312A, I’ve written a separate class ClassKeysightSupply. The class is uploaded to Google Drive. Link: https://drive.google.com/drive/folders/1GdJBQlwKsDKUPlyOlBMnvkMYlgkMN-XW. You can also visit this github repo: https://github.com/abhishek-das98/Keysight-power-supply-MATLAB-classes for an understanding of the class and its usage. I shall write the syntax to work with E36103B with ClassKeySightSupply.
- First thing, the instrument has to be connected with the PC and the power must be ON.
- In MATLAB, first you need to create an instance (for example, obj) that can harness the properties of the class
- obj = ClassKeysightSupply.getInstance()
- Then, you need to connect the power supply with the PC. You also need to mention which power supply you’re going to control, as there are two of them. If you want to work with E36103B, you need to use the name SinglePowerSupply in the connect function.
- obj.connect(‘SinglePowerSupply’)
- The power supply should be connected by now. Now you can read the voltage and current of the instrument by writing the following commands accordingly:
- obj.ReadVoltage([])
- obj.ReadCurrent([])
- You can set the voltage and the current of the power supplies by the following commands:
- obj.setVoltage(5, []) to set the voltage to 5V
- obj.setCurrent(1, []) to set the current limit of the instrument to be 1A
- Now you can turn On the output of the instrument by the following command:
- obj.powerOn([]) The output should be activated now
- To, deactivate the output, type
- obj.powerOff([])
- After working, you can disconnect the power supply from the PC:
- obj.disconnect
E36312A
General Hardware Guideline


The pictures above show you the different functionalities that you can get out of the front panel of the instrument.

- Configuring the USB interface:
- Press the button Utilities on the front panel.
- Then press I/O Config
- Then press USB Status
- Here, you can see the ISN address of the device. The address is USB0::10893::4354::MY61007414::0::INSTR
Working with the Software ‘BenchVue Basic App’
As described before for the case E36103B, you can connect E36312A to your pc and operate the instrument through the Keysight software. All the controls should be fairly straightforward.
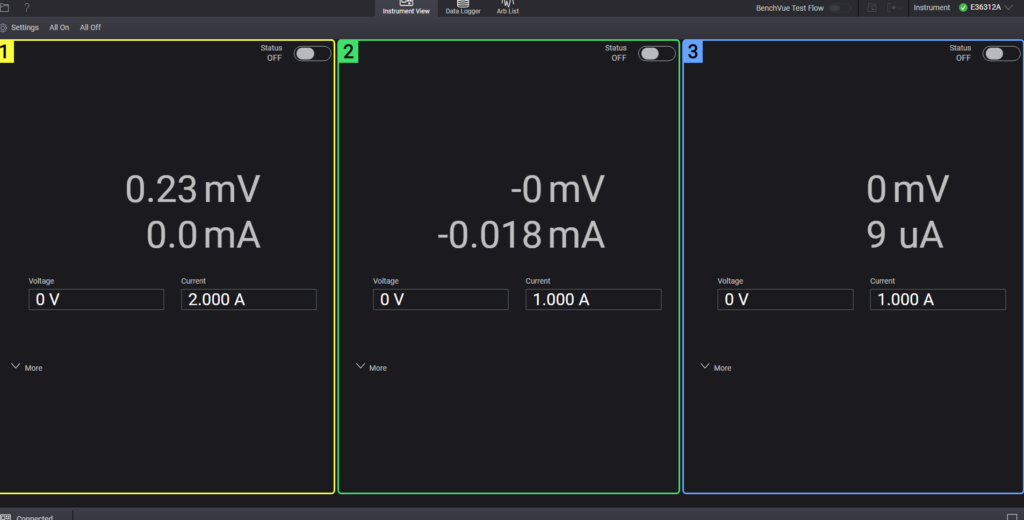
Working with the MATLAB class ClassKeysightSupply()
Using the same class, you can also control E36312A. There are two key differences. First, the name for this power supply is TriplePowerSupply. The second difference now whenever you want to use the methods in the class, you need to pass the channel number as an argument.
- obj = ClassKeySightSupply.getInstance()
- obj.connect(TriplePowerSupply)
- obj.readVoltage(1) % for reading voltage on channel 1
- obj.setVoltage(5.00, 1) % Setting the voltage of channel 1 to be 5 V
- obj.PowerOn(1) % Turns the power on of the first channel
- obj.powerOff(1) % Turns the power of the first channel
- obj.disconnect() % Closes the connection